A simple walk cycle animation featuring my character. The walk cycle is built into the CAT motion system. However since I modelled the character with his arms outstretched I had to modify the animation to get his arms to behave normally.
Monday, 27 February 2012
Rigging
I have used the relatively new CAT system to rig my character. The process is much easier compared to individually creating bones which means a lot of time has been saved. The motion system is also very powerful allowing for the merging of different animations simultaneously.
Saturday, 18 February 2012
Modelling - Finishing Touches
To finish up I added some eyes and eyelids using the same technique from the first tutorial as well as adding an extra spike to his hair. I also added his goggles on top of his head. At the moment I am thinking of having the goggles like this in the animation and at some point he puts them on properly to work.
I will post a storyboard of the animation once I have decided exactly what I want to animate.
Finally I added a small mouth as part of the head model. If I cut away from the middle of the mouth I am sure I can get speach involved too.
I will post a storyboard of the animation once I have decided exactly what I want to animate.
Finally I added a small mouth as part of the head model. If I cut away from the middle of the mouth I am sure I can get speach involved too.
 |
| Eyes |
 |
| With eyelids |
 |
| Adding Goggles |
 |
| Goggles Added |
 |
| Adding Ears |
 |
| Small Ears |
 |
| The Mouth |
 |
| Final Shot |
Modelling - Hands
The hands on the character are an important aspect of the design and will likely feature prominantly in the final animation. For this reason a good deal of care was taken in modelling them. Since the character is quite cartoonish I followed the tutorial video HERE and adjusted slightly to add four fingers rather than just three.
 |
| Starting box |
 |
| Adding digets |
 |
| Turbosmoothed |
 |
| Shaping |
 |
| Positioning |
 |
| Attaching |
 |
| Attached |
 |
| Final Shot |
Wednesday, 15 February 2012
Modelling - Adding Hair
Continuing from the progress made last week I've made a start on adding in the characters crazy hairstyle. My initial plan was to extrude out from the head, much like how I had made the rest of the model but found getting the correct shape very difficult.
Instead I decided to make the hair separately. To do this I imported my initial sketch onto a basic plane and traced the hair using the line tool. I then converted the spline I had made into a single polygon as a starting point.
From this I extruded out to make the hair more 3D and shaped it a bit more...
... and positioned the hair to its approximate location on his head.
This is already looking quite good but needs to be attached to the main model for the skin and hair to flow evenly.
I am quite happy with how the hair has turned out so far. It will still require some tweaking and maybe adding some extra spikes to the sides. Other than that I think it does a good job of giving the character a crazy feel as well as an ageing feel.
Instead I decided to make the hair separately. To do this I imported my initial sketch onto a basic plane and traced the hair using the line tool. I then converted the spline I had made into a single polygon as a starting point.
 |
| A single plane giving me the hair shape. |
From this I extruded out to make the hair more 3D and shaped it a bit more...
 |
| Basic hair shape |
... and positioned the hair to its approximate location on his head.
 |
| Turbosmoothed model - Unattached to body. |
This is already looking quite good but needs to be attached to the main model for the skin and hair to flow evenly.
 |
| After attaching and welding to initial model |
 |
| Current look |
I am quite happy with how the hair has turned out so far. It will still require some tweaking and maybe adding some extra spikes to the sides. Other than that I think it does a good job of giving the character a crazy feel as well as an ageing feel.
Friday, 10 February 2012
Modelling - The Body
I began modelling my character in the last tutorial and figured I should show my progress so far. Majority of the process has gone very smoothly and I am very happy with how it is turning out.
Here are some screenshots I took while I was working:
I started from the feet when beginning the modelling process as I find this a great place to build from, usually much easier than working from the head down or the torso outwards.
I built upon the sole of the shoe by selecting the top polygons, insetting and extruding out. I then extruded upwards a few more times and positioned the vertices appropriately. I finished off by extruding down for the entrance.
Taking advice from a tutorial I once followed last year I started the leg with a simple 8 sided cylinder. With only 8 sides the object is quite easy to work with and also quite accuratly resembles the human shape. I bent the leg at the knee here by default as it more closely resembles my initial sketch and will be the characters default standing position.
To quickly finish the legs and hips I added a symmetry modifier to the object. I will collapse this down later if I plan on making any unique changes to each side.
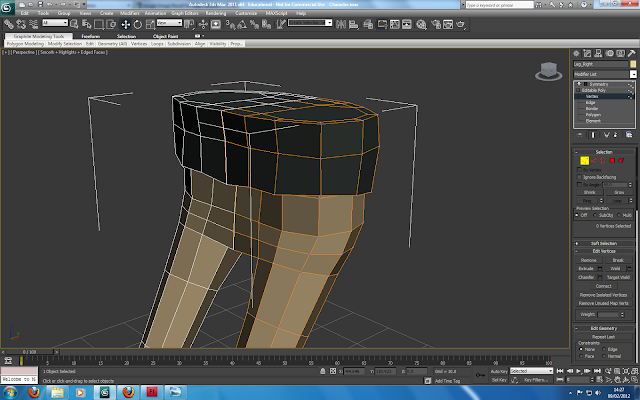
The characters bottom was a bit flat so I shaped it to more realistic proportions.
Using the same method as with the legs I kept extruding upwards but also outwards slightly to make it look as if his shirt comes over his trousers. I pulled the bottom vertices around to make it less straight but will probably come back to it later to add more detail.
When working on building up the rest of the torso I added a slight curve to his back. Like my design sketch he has started to develop a slight hunch induced by his age as well as his lifestyle.
I added the shoulders and begginings of the arms by extruding out from the top of his torso and shaping it into an 8 sides cylinder just like the legs. This will make it much easier to create the arms later.
My initial plan here to create the neck was to delete the polygons inside the neck of his shirt and attach a new cylinder to plug up the hole I later decided against this.
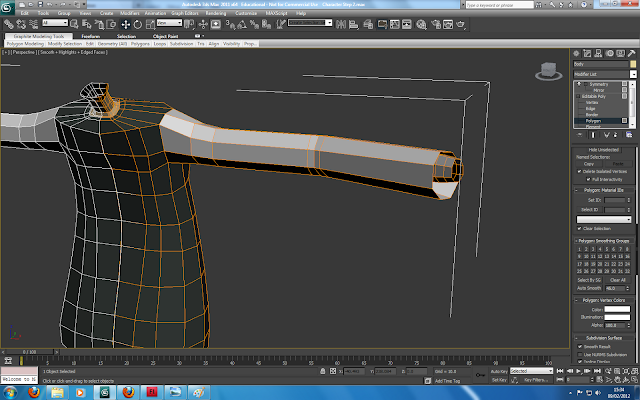
Instead I extruded out from the hole I had created and built the neck from the same object.
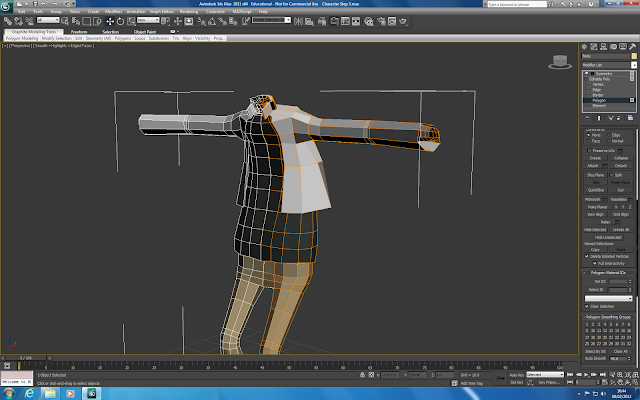
I created the arms in a similar manner to the legs. Since he is wearing a lab coat not much shape detail is required and most of the arm is the same diameter. The end of the sleeves pull back in and build out again as his wrists.
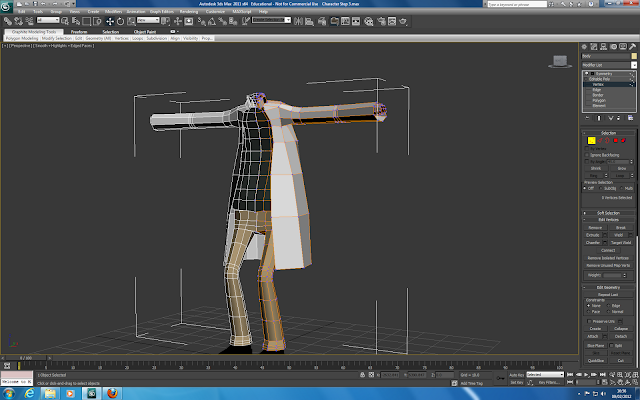
Adding the rest of his lab coat proved to be a fairly difficult concept to get my head around. I thought of making it a seperate object but decided against it. It would be too much work and require changing some of the existing model. Instead I extruded the polygons around his neck and shoulders and designated it as his coat. Then I built outwards from the model to have the rest of the coat dangle seperately.
Because the coat from his armpits downwards is not attached to anything I have the ability to freely animate it as he walks. I am unsure whether this we be done using some sort of cloth modifier or simply giving the coat its own rigging. Either way I am certain I can get some movement out of his coat in the final animation.
The above screenshot shows how the model looks with turbosmooth turned on. Not bad!
Since the characters head is very stylised I was unable to find a good tutorial which would help me make it. After a failed attempt at creating the head seperatly I decided to just build upwards from the neck I had created earlier.
I have the basic shape of the head done now. It will require a lot more tweaking and smoothing out. A great deal of attention will need to be added to this part of the model as it is mostly likely to be featured often during the animation itself.
Here are some screenshots I took while I was working:
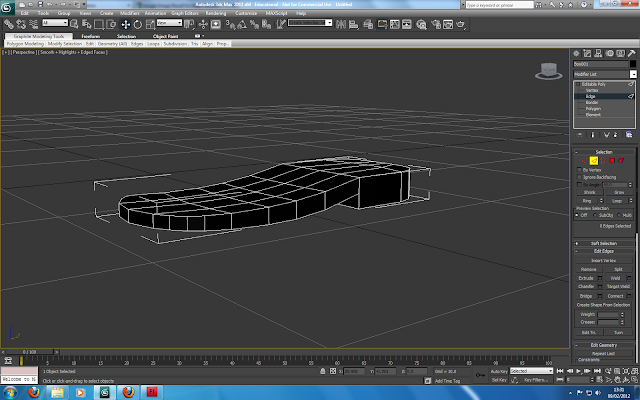 |
| Creating the sole of the shoes. |
I started from the feet when beginning the modelling process as I find this a great place to build from, usually much easier than working from the head down or the torso outwards.
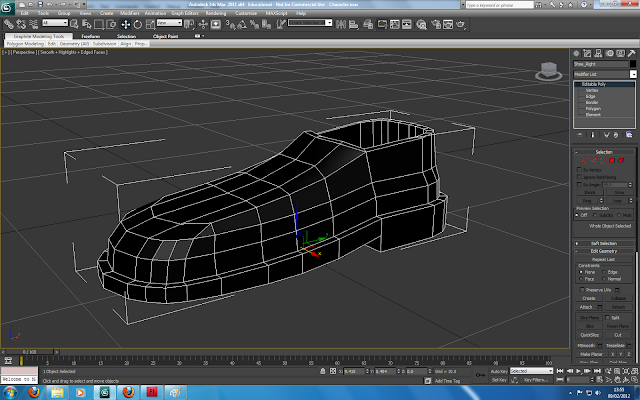 |
| The rest of the shoe |
I built upon the sole of the shoe by selecting the top polygons, insetting and extruding out. I then extruded upwards a few more times and positioned the vertices appropriately. I finished off by extruding down for the entrance.
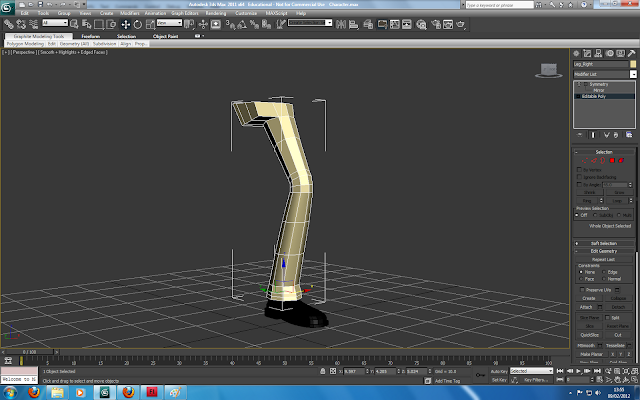 |
| The leg and beginning of the hips |
Taking advice from a tutorial I once followed last year I started the leg with a simple 8 sided cylinder. With only 8 sides the object is quite easy to work with and also quite accuratly resembles the human shape. I bent the leg at the knee here by default as it more closely resembles my initial sketch and will be the characters default standing position.
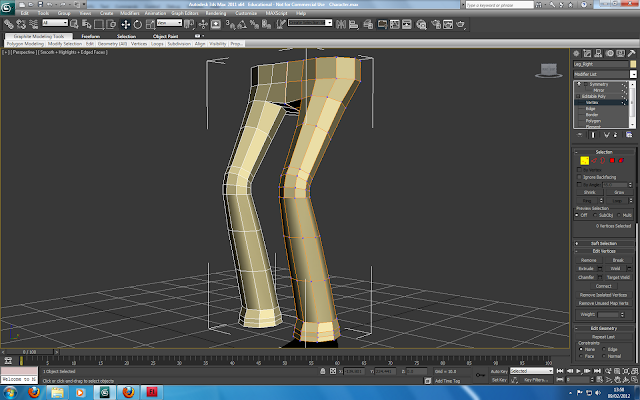 |
| Adding Symmetry |
To quickly finish the legs and hips I added a symmetry modifier to the object. I will collapse this down later if I plan on making any unique changes to each side.
 |
| Shaping the.... |
 |
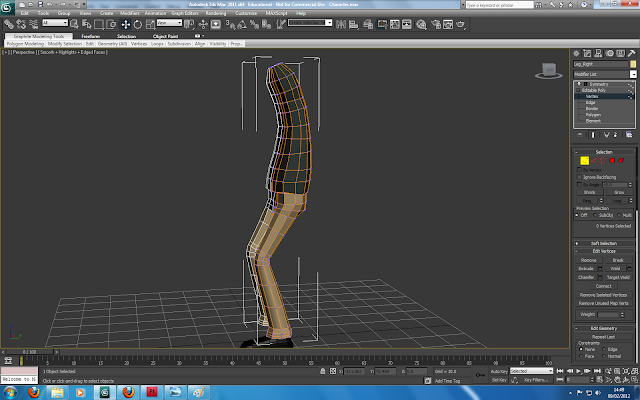
| The torso |
Using the same method as with the legs I kept extruding upwards but also outwards slightly to make it look as if his shirt comes over his trousers. I pulled the bottom vertices around to make it less straight but will probably come back to it later to add more detail.
 |
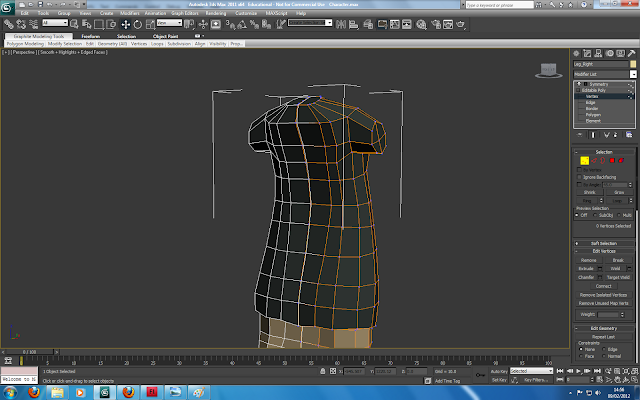
| The torso continued |
When working on building up the rest of the torso I added a slight curve to his back. Like my design sketch he has started to develop a slight hunch induced by his age as well as his lifestyle.
 |
| Adding the shoulders |
I added the shoulders and begginings of the arms by extruding out from the top of his torso and shaping it into an 8 sides cylinder just like the legs. This will make it much easier to create the arms later.
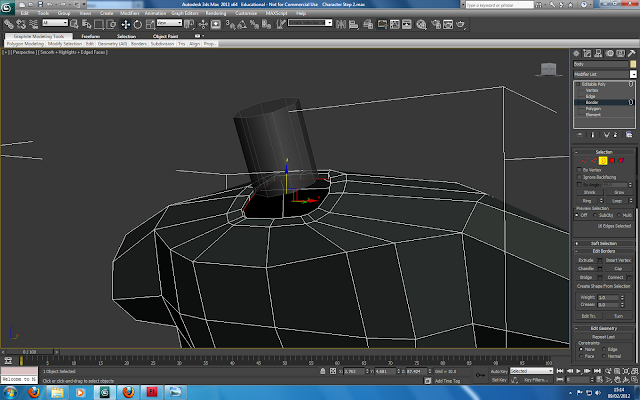 |
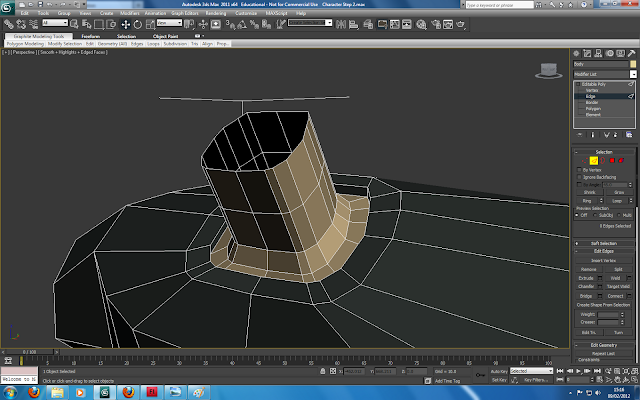
| Adding the neck |
My initial plan here to create the neck was to delete the polygons inside the neck of his shirt and attach a new cylinder to plug up the hole I later decided against this.
 |
| The neck finished |
Instead I extruded out from the hole I had created and built the neck from the same object.
 |
| Adding the arms |
I created the arms in a similar manner to the legs. Since he is wearing a lab coat not much shape detail is required and most of the arm is the same diameter. The end of the sleeves pull back in and build out again as his wrists.
 |
| Adding his coat |
Adding the rest of his lab coat proved to be a fairly difficult concept to get my head around. I thought of making it a seperate object but decided against it. It would be too much work and require changing some of the existing model. Instead I extruded the polygons around his neck and shoulders and designated it as his coat. Then I built outwards from the model to have the rest of the coat dangle seperately.
 |
| Full length |
Because the coat from his armpits downwards is not attached to anything I have the ability to freely animate it as he walks. I am unsure whether this we be done using some sort of cloth modifier or simply giving the coat its own rigging. Either way I am certain I can get some movement out of his coat in the final animation.
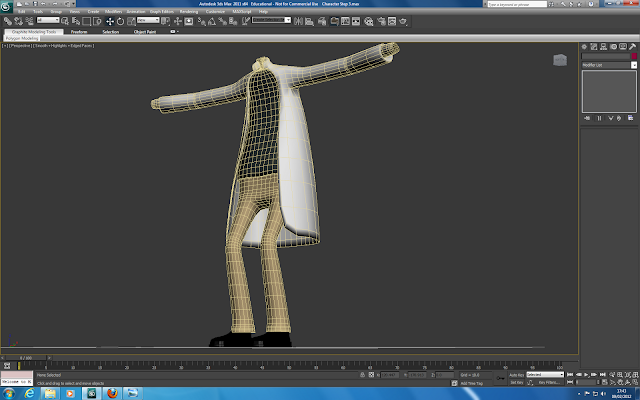 |
| Turbosmoothed! |
The above screenshot shows how the model looks with turbosmooth turned on. Not bad!
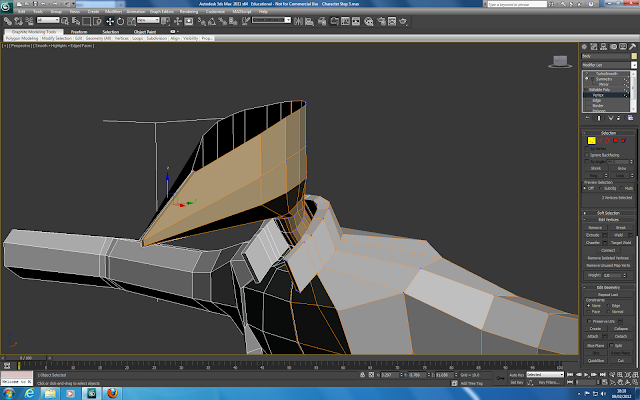 |
| A very pointy chin. |
Since the characters head is very stylised I was unable to find a good tutorial which would help me make it. After a failed attempt at creating the head seperatly I decided to just build upwards from the neck I had created earlier.
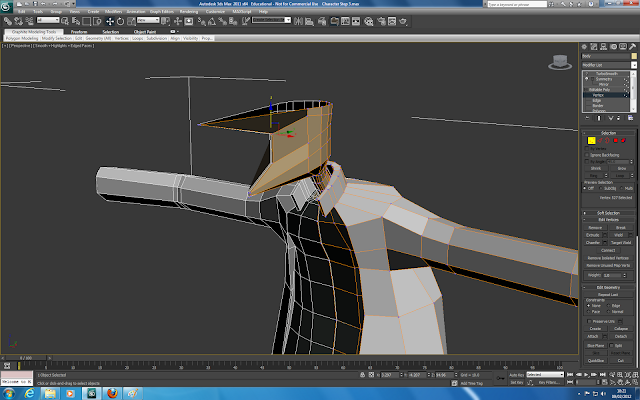 |
| And a pointy nose |
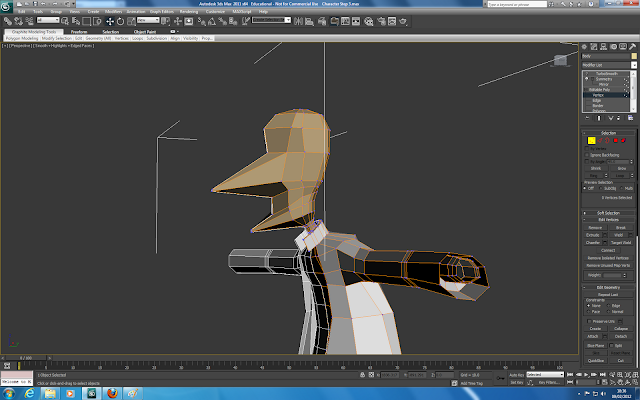 |
| Basic shape complete |
I have the basic shape of the head done now. It will require a lot more tweaking and smoothing out. A great deal of attention will need to be added to this part of the model as it is mostly likely to be featured often during the animation itself.
Monday, 6 February 2012
Character Development
Building upon the character design in the previous post I have come up with a number of personality traits to help flesh him out into a more believable character.
Name: Dr. Charles Strite | Age: 54 | Profession: Inventor
Charles never made it as a famous inventor, he developed a bad reputation when he was younger for claiming others had stolen his ideas without any proof. Whether his accusations were true or not remains a mystery. Regardless, Charles despises the world for not believing him and aims to one day invent something so amazing, something so life changing that nobody would dare question he had never invented it himself.
However the years have taken a toll on Charles' sanity causing him to become a little crazy, coupled with his age he is often slightly forgetful and sometimes makes mistakes. Many of his inventions are built with revenge purely in mind but end up going oddly wrong giving him the title of "Dr. Crazy Scientist Guy"
I think this character would fit quite well with a childrens cartoon show. While being easily recognisable as the villain he is also never too threatening because his inventions never pan out the way he wants them too, often in comical ways.
Initial Character Design
My initial character design idea was that of an evil scientist type. It is a fairly common style of villian but is easily my favorite too. I pictured him as a thin and quite tall character with wild grey hair, big glasses which take up most of his face and a large swishy lab coat or shirt.
I decided to make a sketch of this character and added different design ideas which I think went well as I went along.
The visual style, inparticularly the hands are heavily influenced from the Dr Doofenshmirtz character I looked at previously. The way in which the character displays his emotions is most visible in his hand movements and gestures. Something I intend to try and emulate with this character.
Many of the other design choices I made represent my findings in earlier research, for instance I chose to use black and red in the colour scheme to give a dark villian like style. A pointed, sharp, nose and chin also help give a dangerous feel.
Thursday, 2 February 2012
Animation References
For some ideas on what kind of animation will be needed to appriopriately display the characters villian traits I have looked up a number of video clips which show them.
From my overall understanding from watching these clips it is quite clear that hand gestures play a very important role in showing a villains emotions. Facial expressions are usually overly done.
Time:
0:20 - 0:31
Dr Doofenshmirtz from Phineus and Ferb laughs and gestures at his evil plans.
I particularly like the hand gestures he does at the end of the clip. It is asossiated with madness and scheming. Perfect for my animation.
Time:
0:38 - 0:44
Dr Robotnik from Sonic the Hedgehog makes evil hand gestures and faces.
Once again the wriggling fingers gesture shows up. He also raises his hands as seen to the left here.
Time:
6:57 - 7:02
Captain Hook from Disney's Peter Pan.
There are loads of great scenes in this video. Captain hook inparticular is a huge user of hang gestures (a feat considering he has only 1) often being overly dramatic when he does them.
His facial expressions also border on insane.
Time:
6:12 - 6:22
Yzma from The Emperors New Groove
She mostly acts through her facial expressions and does a number of crazy faces.
From my overall understanding from watching these clips it is quite clear that hand gestures play a very important role in showing a villains emotions. Facial expressions are usually overly done.
 |
| http://www.youtube.com/watch?v=wFj8z51YBaI |
Time:
0:20 - 0:31
Dr Doofenshmirtz from Phineus and Ferb laughs and gestures at his evil plans.
I particularly like the hand gestures he does at the end of the clip. It is asossiated with madness and scheming. Perfect for my animation.
 |
| http://www.youtube.com/watch?v=NUa8DLg1TCE |
Time:
0:38 - 0:44
Dr Robotnik from Sonic the Hedgehog makes evil hand gestures and faces.
Once again the wriggling fingers gesture shows up. He also raises his hands as seen to the left here.
 |
| http://www.youtube.com/watch?v=v3EPXGwkRQ0 |
Time:
6:57 - 7:02
Captain Hook from Disney's Peter Pan.
There are loads of great scenes in this video. Captain hook inparticular is a huge user of hang gestures (a feat considering he has only 1) often being overly dramatic when he does them.
His facial expressions also border on insane.
 |
| http://www.youtube.com/watch?v=aT6KAaShAL8 |
Time:
6:12 - 6:22
Yzma from The Emperors New Groove
She mostly acts through her facial expressions and does a number of crazy faces.
Subscribe to:
Comments (Atom)


